How to Build a Mobile Video Application (WebRTC)
Photo Source: Interactive Powers, Pexels. Creative Commons
In this post we will show you how to build a video call service in your mobile by using the Ionic Framework 2 and VideoRTC.js.
Step 1: Setting up the basic structure
Firstly, you need to install an Ionic project in your system. If you don’t have it, you can download and follow the official guide from the Ionic Framework 2 web site.
After it, the library VideoRTC.js must be included in your project.
You can easily add the following script tag at the entry point of your application src/index.html like this:
<script src="assets/js/videortc.min.js"></script>
Next, we have to establish the connection to the desired video server, following these steps:
- We define a new variable inside our class, with the data of the server.
- In our app’s constructor we initialize the new variable with the class VideoRTC. In the class VideoRTC, you should introduce the variables that have been previously created.
export class My_App {

   public my_videogateway: any = null;
   server:any  = ["https://example.com:HTTPS_PORT/webrtc-gateway"];
   iceServers:any  = [ ];
   debugLevel:any = “error”;

   constructor(public navCtrl: NavController) {
       this.my_videogateway = new VideoRTC(this.server, this.iceServers, this.debugLevel);
   }
}
After connecting with the video gateway server, you must copy and paste the following Type Script code in your development outside of constructor. It is the basic structure to start designing your videocall service with Ionic:
this.my_videogateway.connect().then( useCases => {
   this.useCases = useCases;
   let onEvents = {
       onAccepted:(userName) => {
           //It is executed when the call is accepted by a user;
       },
       onCalling:(userName) => {
           //It is executed when It start calling a user.
       },
       onDataReceived:(type, data, filename,userName) => {
           //It executes when information is received by the data channel.
       },
       onGotPeers:(list) => {
           //It executes when the server responds to the request of getPeers();
       },
       onHangUp:(userName, reason) => {
           //It is executed when a call is hung. (Decline)
       },
       onIncomingCall:(userName) => {
           //It is executed when there is an incoming call.
       },
       onRegistered: (userName, isRegistered) => {
           //It is executed when the server responds to the register() method;
       },
       onSetCall:() => {
           //Set
       }
   };
   var options = { //Optional
       dataChannel: {
           dataEnabled: true,
           allowedTypes: ['application/x-chat', 'text-plain', 'application/pdf']
       }
   };
   let domElements = {
       //HTML element where the video will be hosted.
       videos: document.getElementById(‘videos')
   };
   useCases.videoCall(onEvents, domElements,options)
       .then((action) => {
           // Use Case has been atacched succesfully
           this.actions = action;
           action.register(this.user);
           action.getPeers();
       })
       .catch((cause) => {
           // Error attaching the Use Case
           console.log("Error Attach " + cause );
       })
})
.catch( cause => {

})
Step 2: Registering users
We already have the basic structure to personalize the application. In the following steps, we will add the logic that allows register and call between two users.
- action.register(); → We should add our name in the method or the user identification that it is registered in the videocall.
For instance:
this.action.register(‘Tom’);
Once the call has been registered, user ‘Tom’ can call another user. You have to insert it in a code block, so that you can see it within onRegistered.
- action.call(); → We must also include in the following method the name of the receiver.
For instance:
this.action.call(‘Jack’).
Step 3: How to accept the videocall
Finally, we must follow the procedure that allows to accept the call. Here, there are two different options. We can either directly include ‘action.call()’ in the object onIncomingCall, so the call is automatically accepted, or you can design your own logic using Ionic components like for example a confirmation button.
You can see more information about the components at Ionic Framework 2.
After the explained process, and by adding some CSS style, you can shape the design of the application.
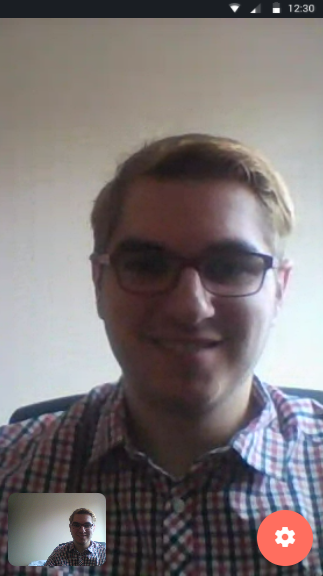
Step 4: Running the service and peers…
Open your app mobile and start video calling between two peers. Remember, this demo works properly with the WebRTC communication through our API Framework / VideoRTC.js resources. Please, contact our sales for any project or more information.
Peer 1 (Tom) and Peer 2 (Jack)
Feel free to reach out if you have any questions or comments bellow or just want to show off what kind of cool stuff you’ve built with VideoRTC.js.
Email: support@ivrpowers.com · Twitter: @ivrpowers · Github: IVRPowers
Interactive Powers - Streamline your business communications